Ornament craft for kids A girl and a glue gun
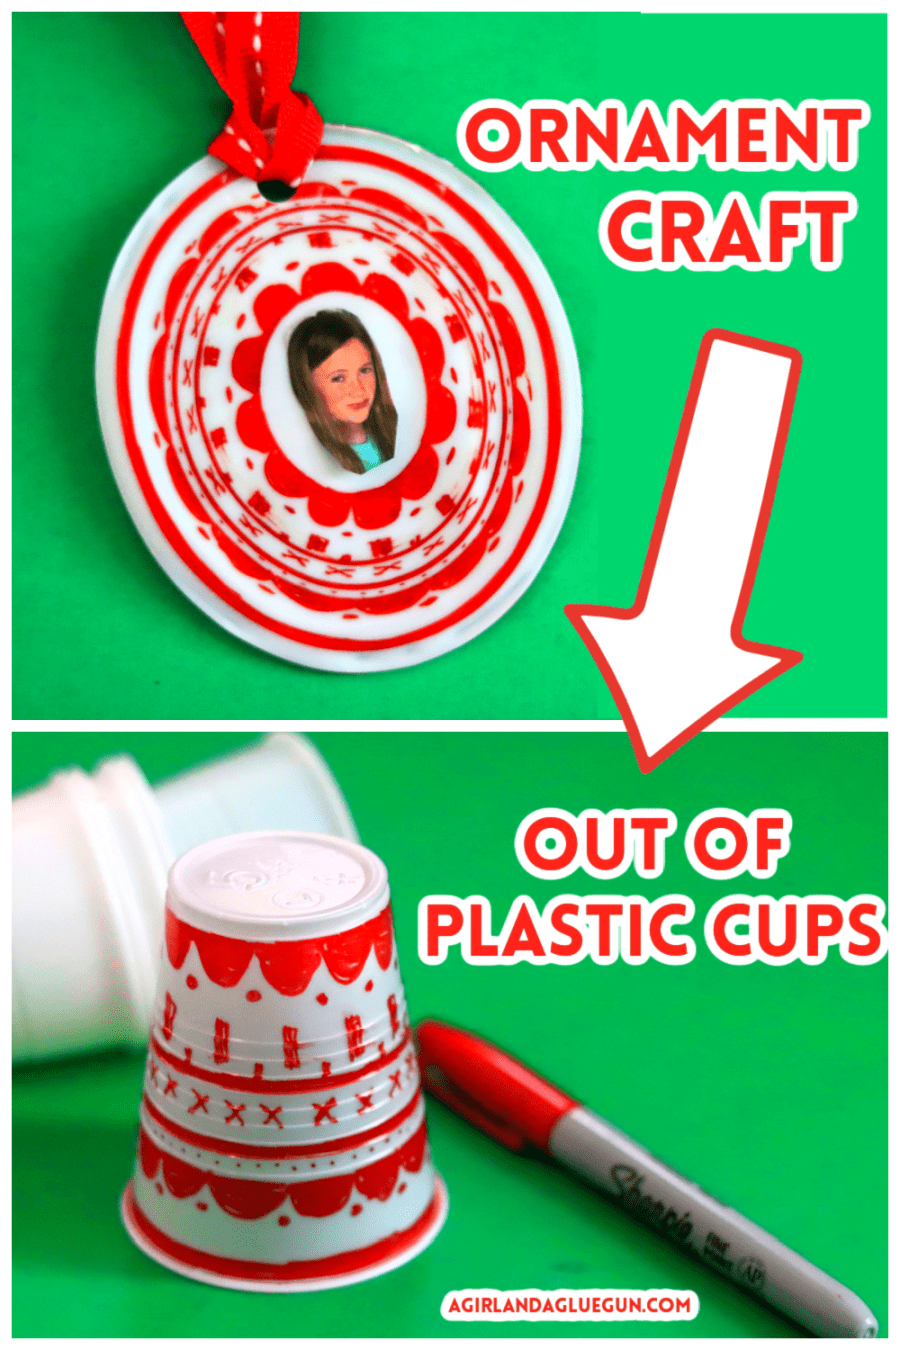
Hole punch. Cord, ribbon, or pipe cleaners. Instructions. Preheat your oven to 250° F on the broil setting. Prepare a sheet pan by covering it in tin foil. If using recycled plastic cups, wash the used cups before using. Create a space where your children can use permanent markers stress-free.

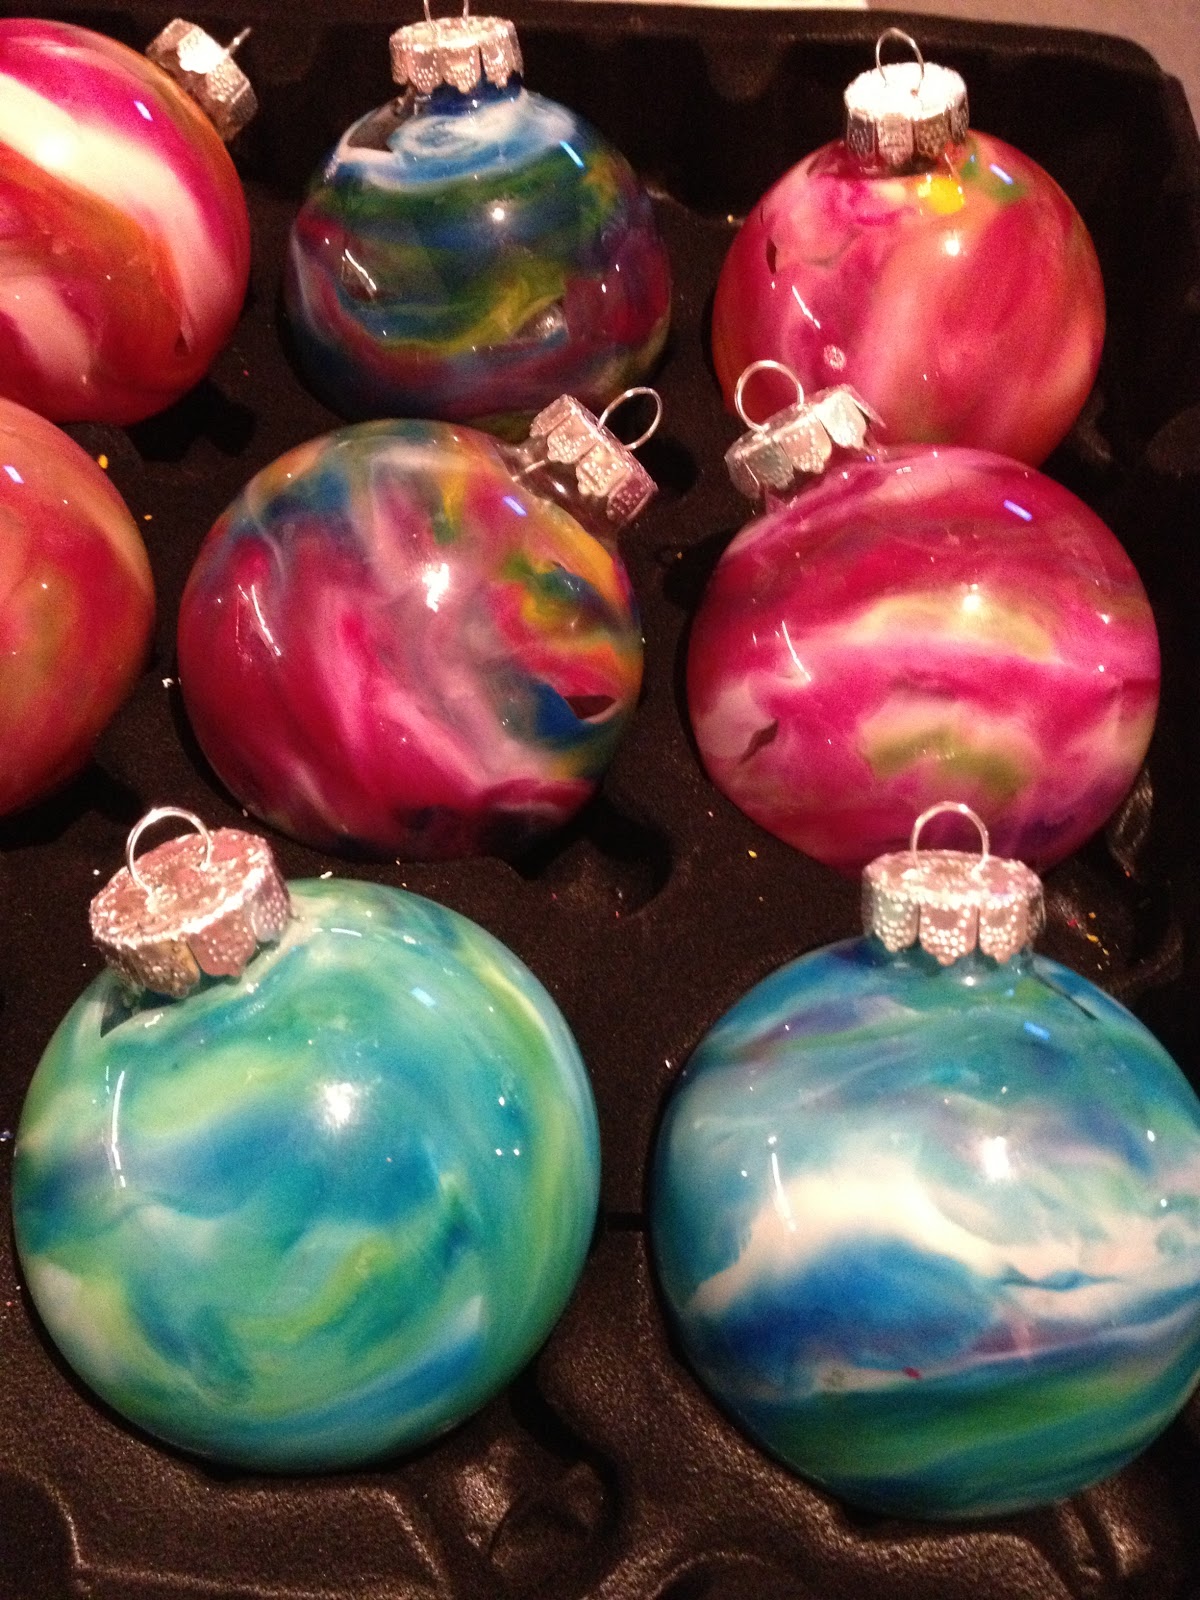
MELTED CHRISTMAS ORNAMENTS This is an incredibly fun ornament to make
We designed cups with sharpies and then melted them in the oven to make Christmas ornaments. They turned out really awesome everyone should try this!

EasyMeWorld How To Make Melted Christmas Ornaments
Make a few holes around the outside of the cup to be sure that at least one of the holes does not melt closed. During our experiment we punched 2 holes. One hole closed up but the other did not. It is also MUCH EASIER to punch the holes in the unbaked plastic. The plastic becomes brittle after it is baked and it was easy to break while punching.

Melted plastic cup craft! Neato! Plastic cup crafts, Cup crafts, How
Once the cups are colored, preheat your oven to 350 degrees F. Line a baking sheet with aluminum foil and place the cups on the baking sheet. Bake the plastic cups for 3-5 minutes- until they are melted and flattened. Remove from the oven and allow them to cool completely before touching them or removing them from the tray.
Living, Loving, Laughing, & Creating Everyday Melted Crayon Ornaments!
Preheat your oven to 350f, they didn't have any smell to them while melting. Draw designs on your cups with PERMANENT marker, we used Sharpies. Then I placed them on a cookie sheet lined with parchment, I didn't want them to stick and they never did. We spinkled a little glitter on the top of a few of them, some of the glitter stuck as it.

Colored clear plastic cups, melted in oven at 350 degrees for 10
Next, you want to grab a cookie sheet, and line it with aluminum foil. Put the completed plastic cups upside down onto the cookie sheet. The flat bottom should be up in the air. Allow plenty of space in between each cup so they don't melt together. Preheat your oven to 400º Fahrenheit (205º Celsius).

EasyMeWorld How To Make Melted Christmas Ornaments
For the full instructions visit: https://onelittleproject.com/melted-bead-ornaments/These melted bead ornaments are SO BEAUTIFUL! And they are so easy to mak.

Melted Plastic Cup Ornaments Plastic cup crafts, Melted plastic
1). Preheat your oven to 450 degrees. 2). Place tin foil on a baking tray. 3). Decorate your cups using your Sharpies. I tried various ways of doing this- coloring the entire cup, coloring parts of the cup, and coloring/decorating the ornaments after they melted. See my tips below for more details on that. 4).

Melted Plastic Cup Ornaments Xmas crafts, Melted plastic, Preschool
Line muffin tin with cupcake liners. Add 4-5 crayon pieces to each glass ornament. Place one ornament with opening facing up on each cupcake liner. Bake in oven for 10-15 minutes. Remove muffin pan from oven and swirl each ornament until melted crayons coat the inside of each ornament. Work quickly because the crayons cool fast.

Easy DIY Melted Bead Christmas Ornaments YouTube
This is a fun Christmas craft for kids. Kids love to color and it only takes 20 seconds to melt the cups. Through trial and error we figured out the best way.

Melted Plastic Cup Ornaments Melting plastic cups, Melted plastic
DIY Christmas Ornaments Made With A Plastic Cup
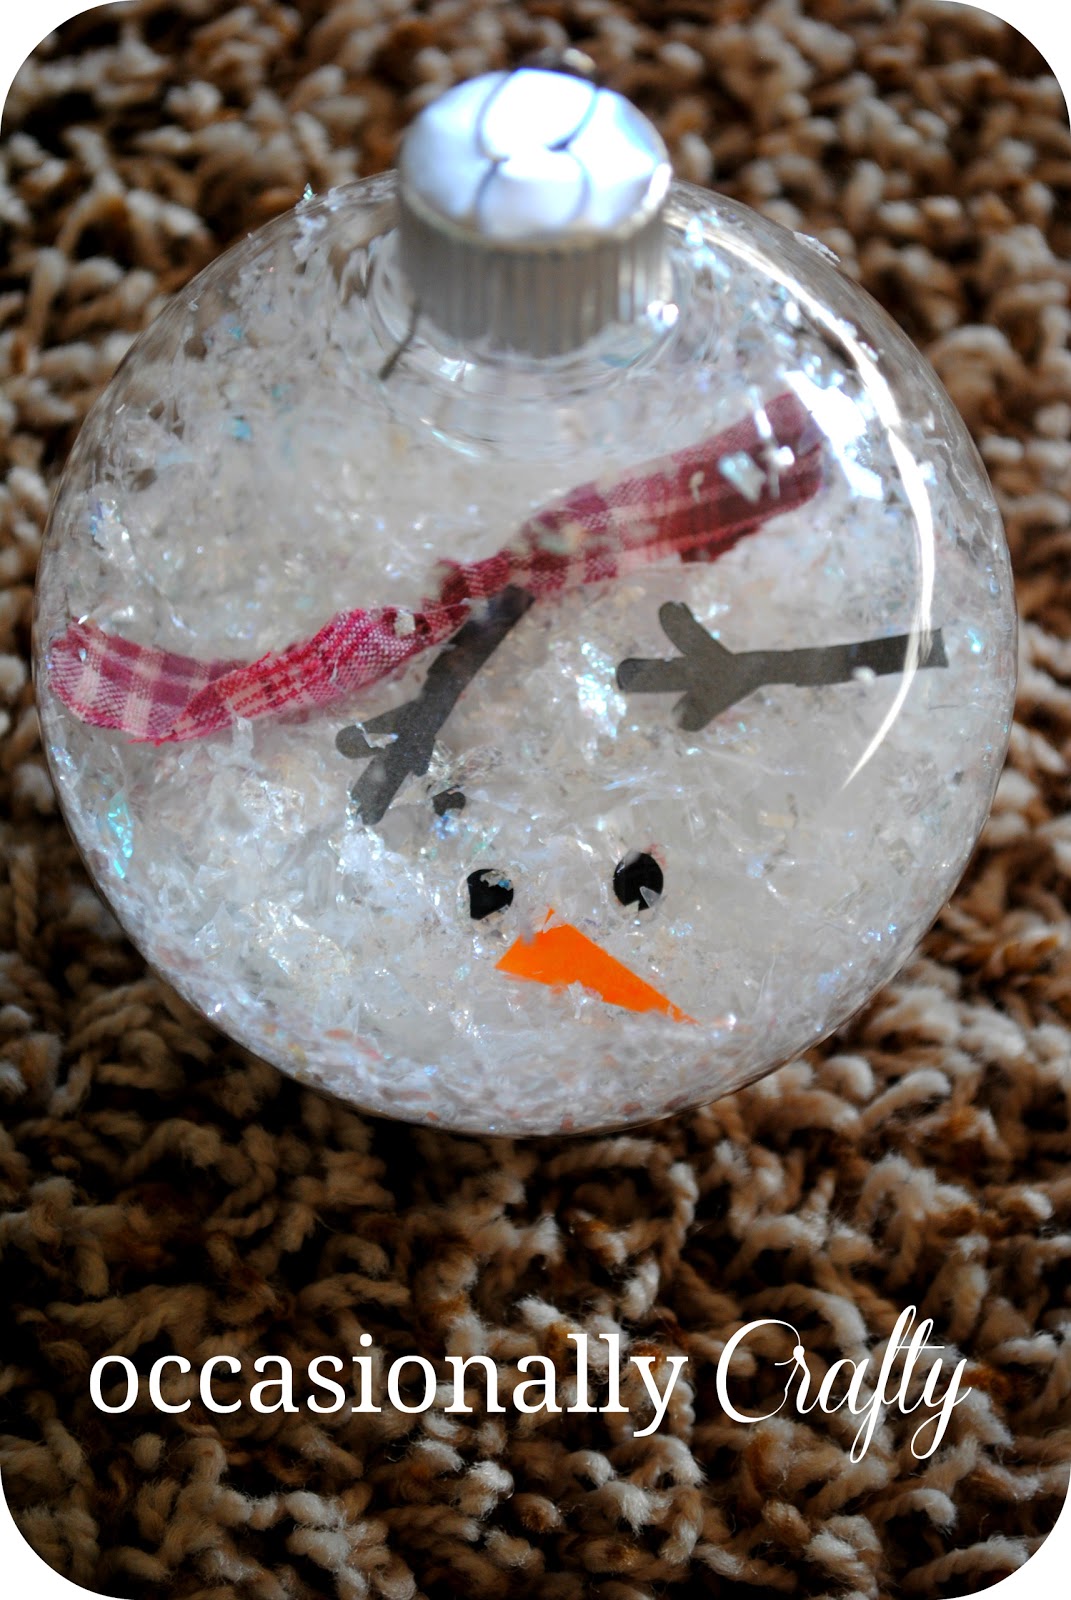
Melted Snowman Ornament Occasionally Crafty Melted Snowman Ornament
How to make shrinky dink ornaments: Draw with permanent markers on plastic cups. (Remember that they have to be Polar brand!) Hole punch the cup. Place on cookie sheet and put in 250° oven. Turn the oven light on and watch until the cup shrinks down to a flat circle. Note that only the ornament in the middle of the cookie sheet will be.

Melted Peppermint Candy Ornaments Christmas Candy Ornaments
Place the pan into a cold toaster oven then bake at 450F for 8 to 12 minutes. (Mine took 11 minutes, but it was a cold day) Remove the pan from the toaster oven when the beads have completely melted together, but before they start to bubble. Place the pan in the freezer for 10 minutes to cool.
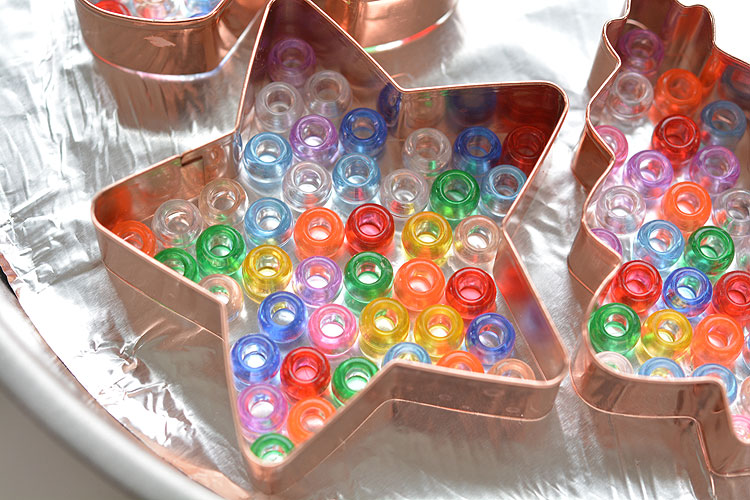
Melted Bead Ornaments Pony Bead Christmas Ornaments
Place your plastic cup ornament open side down on your cookie sheet and place in oven. These will start to melt almost immediately! Our ornaments took about 30-45 seconds total. When they look to be almost flat, I open the door, take my spatula and flatten it down all the way before pulling them out of the oven.
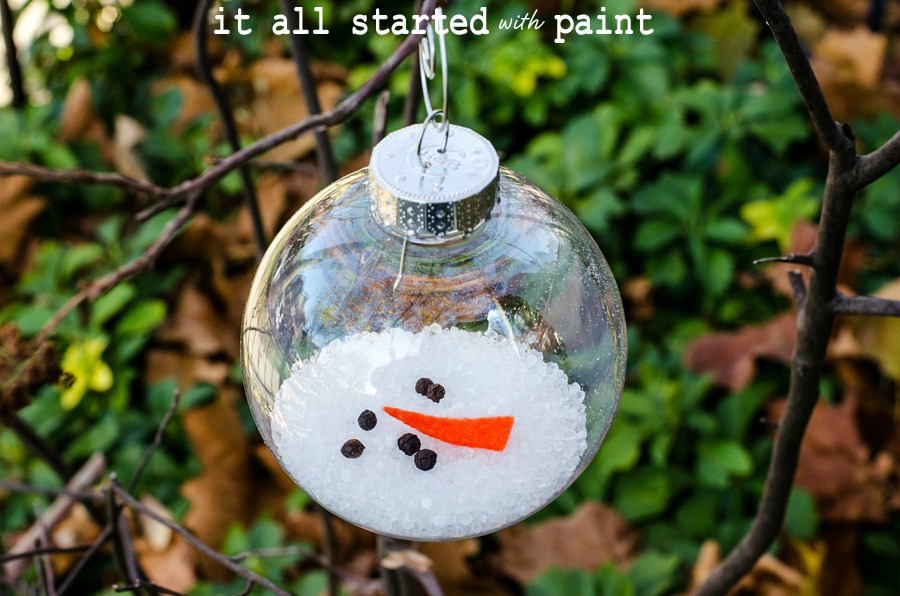
Melted Snowman Ornament
In a microwave, heat them for one minute. Allow the crayons to completely dry before placing them in a bowl. After the molding has dried, remove it. Soak the crayon in hot water for a few minutes before releasing it. When you use water to soften the paper, it will be easier to remove.
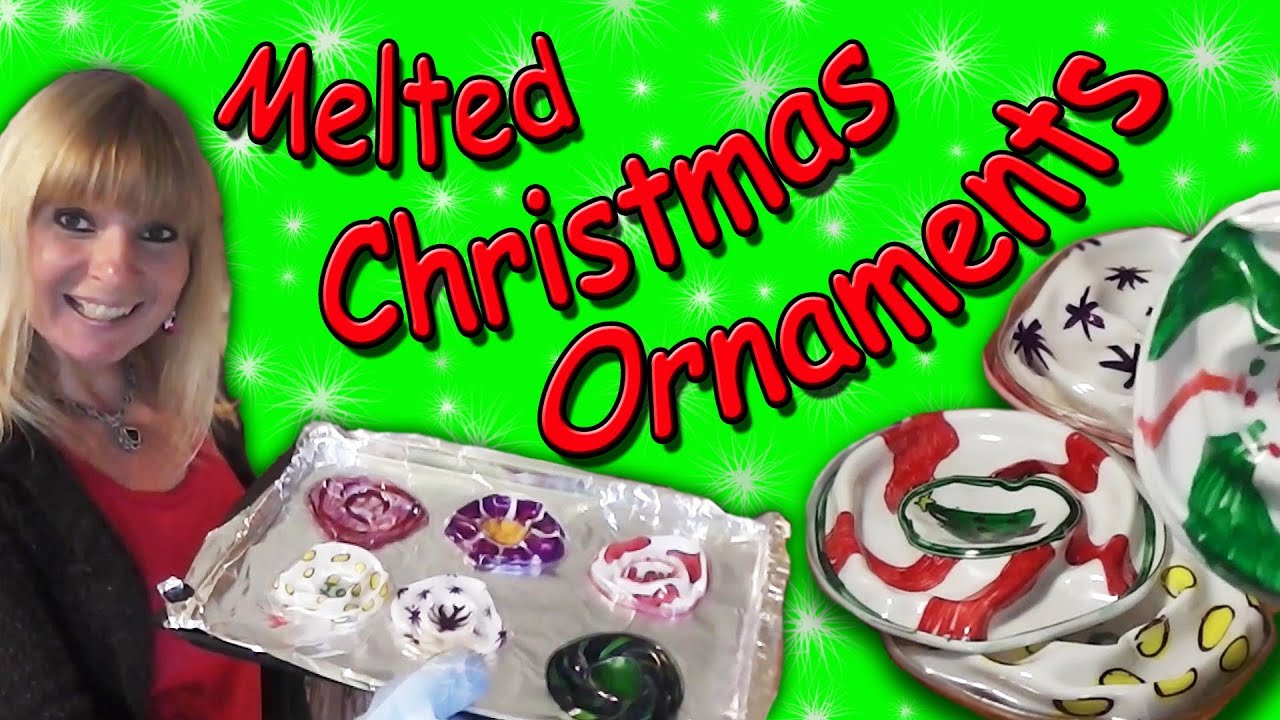
How To Make Melted Christmas Ornaments Out Of Cups YouTube
The original cups I used were pretty good quality, but #1 plastic. I bought some cheap plastic cups that were made from #6, and tried an experiment. Using permanent markers I drew bands of color around a cup, to emulate the Kadinsky circles from the original idea. Then I drew scribbles on another cup to emulate a toddler's version.